“
High-Protein Chocolate Lava Cake (Gluten-Free & Molten Core Recipe)
The culinary challenge of a high-protein lava cake lies in preventing the denaturation of proteins from resulting in a dry, rubbery texture. This recipe utilizes a whey-casein protein blend for its superior moisture-retention properties compared to pure whey isolate. The “”lava”” effect is achieved through a controlled thermal gradient; by utilizing a high-fat chocolate core or purposeful underbaking of the center, the interior remains a viscous emulsion while the exterior forms a stable, aerated sponge. The inclusion of almond flour provides the necessary lipid content to mimic the mouthfeel of traditional butter-based cakes without compromising the anabolic profile.
Recipe Details
- Prep Time: 10 Min
- Cook Time: 12 Min
- Total Time: 22 Min
- Yield: 1 Cake
- Calories: 280 kcal per cake
Ingredients:
Dry Components
- 25g Chocolate Whey/Casein Protein Powder
- 10g Dutch-processed Cocoa Powder
- 15g Super-fine Almond Flour
- 1/2 tsp Baking Powder
- 1 tbsp Zero-calorie Granulated Sweetener (Erythritol/Stevia)
Wet Components
- 1 Large Egg (at room temperature)
- 30g Non-fat Greek Yogurt
- 1 tbsp Unsweetened Almond Milk
- 1/4 tsp Vanilla Extract
The Molten Core
- 10g Dark Chocolate Square (70% Cocoa or higher)
Preparation Steps:
1. Dry-Wet Integration
- Preheat your oven to 180°C (350°F). Thoroughly grease a standard 6oz ceramic ramekin with coconut oil or non-stick spray.
- In a small bowl, whisk the dry components until no clumps of cocoa powder remain.
- In a separate vessel, whisk the egg, Greek yogurt, and almond milk until the mixture is fully emulsified and smooth.
- Slowly fold the dry ingredients into the wet ingredients using a spatula. Do not overmix; stop once the batter is homogenous to avoid over-activating the proteins which leads to toughness.
2. Core Insertion & Baking
- Pour 3/4 of the batter into the prepared ramekin.
- Place the dark chocolate square directly in the center of the batter.
- Cover the chocolate with the remaining batter, ensuring it is fully submerged.
- Bake for 11–13 minutes. The edges should be firm and set, but the center should still have a noticeable jiggle when the ramekin is shaken.
3. De-molding & Service
- Remove from the oven and allow it to rest for 2 minutes. This brief cooling period allows the outer sponge to pull away from the ramekin walls slightly.
- Run a thin knife around the edge and carefully invert the cake onto a plate.
- Serve immediately to maintain the viscosity of the molten center.
Expert Tips:
- The Casein Advantage: Always prefer a protein blend (Whey + Casein). Pure whey isolate tends to “”leak”” moisture during the bake, resulting in a dry cake. Casein binds the water, creating a fudgy texture.
- Ramekin Sizing: Using a ramekin that is too wide will cause the cake to bake through too quickly, losing the lava center. A tall, narrow 6oz ramekin is optimal for the thermal gradient.
- Salt Enhancement: A tiny pinch of flaky sea salt on top after de-molding will suppress the bitterness of the cocoa and amplify the perceived sweetness of the erythritol.
“
“
Creamy Whipped Cottage Cheese & Honey Protein Dip (5-Minute Recipe)
The transition of cottage cheese from a non-homogeneous curd structure to a smooth dip is achieved through mechanical shearing. This process breaks down the structural protein clusters (curds) and realigns the casein and whey proteins into a stable, aerated emulsion. By incorporating air during high-speed blending, the dip gains a light, mousse-like viscosity while maintaining its high-density protein profile. The addition of honey acts as a natural humectant and stabilizer, while the acidity from lemon zest helps to brighten the flavor profile and slightly tighten the protein matrix for a better “”scooping”” consistency.
Recipe Details
- Prep Time: 5 Min
- Cook Time: 0 Min
- Total Time: 5 Min
- Yield: 2 Servings
- Calories: 180 kcal per serving
Ingredients:
The Whipped Base
- 1.5 cups (340g) Full-fat Cottage Cheese (4% fat recommended for creaminess)
- 1 tsp Vanilla Extract
- 1 tsp Freshly grated Lemon Zest
Sweeteners & Stabilizers
- 2 tbsp Raw Honey or Manuka Honey
- 1 pinch Fine Sea Salt
Preparation Steps:
1. Mechanical Emulsification
- Place the cottage cheese, vanilla, lemon zest, and salt into a high-speed blender or food processor.
- Process on high for 60-90 seconds. Stop halfway to scrape down the sides of the bowl to ensure every curd is processed.
- Continue blending until the mixture is glossy and silk-smooth, resembling a thick pastry cream rather than cottage cheese.
2. Integration & Aeration
- Add 1.5 tablespoons of honey into the blender.
- Pulse 3-5 times just until the honey is integrated. Over-blending at this stage can cause the honey to break down the aeration, making the dip too runny.
3. Serving & Finishing
- Transfer the dip to a chilled shallow bowl.
- Use the back of a spoon to create decorative swirls on the surface.
- Drizzle the remaining 1/2 tablespoon of honey over the top and garnish with additional lemon zest or a sprinkle of cinnamon.
Expert Tips:
- Fat Content Matters: Use 4% fat cottage cheese for the best structural integrity. Low-fat or fat-free versions have a higher water-to-protein ratio and may become watery after whipping.
- Chilling for Consistency: For a firmer, “”scoopable”” texture, refrigerate the whipped dip for 30 minutes before serving. This allows the fats to re-solidify and the protein matrix to set.
- Serving Pairings: This dip is best served with high-fiber vectors like sliced Granny Smith apples, strawberries, or low-carb cinnamon pita chips.
“
“
High-Protein Strawberry Shortcake Bowls (Anabolic Muscle-Building Dessert)
The anabolic strawberry shortcake bowl re-engineers a high-sugar classic into a performance-focused meal by utilizing hydrophilic protein sources and osmotic maceration. The “”shortcake”” base is synthesized using a blend of whey protein and coconut flour, which provides the necessary structural fiber to mimic a traditional crumb while maintaining a high protein-to-carbohydrate ratio. The strawberry component relies on the addition of a granulated sweetener to create a solute gradient, drawing moisture out of the fruit’s cellular structure to form a natural, low-calorie syrup. The final assembly utilizes a stabilized Greek yogurt protein cream, which provides a slow-digesting casein source, making this an ideal nocturnal recovery meal.
Recipe Details
- Prep Time: 10 Min
- Cook Time: 2 Min
- Total Time: 12 Min
- Yield: 1 Large Bowl
- Calories: 310 kcal per bowl
Ingredients:
The Protein Sponge
- 31g (1 Scoop) Vanilla Whey/Casein Protein Powder
- 1 tbsp (7g) Coconut Flour (for moisture retention)
- 1/2 tsp Baking Powder
- 3 tbsp (45g) Liquid Egg Whites
- 1 tbsp Unsweetened Applesauce (fat replacement)
Macerated Strawberries
- 150g Fresh Strawberries (sliced)
- 1 tsp Lemon Juice
- 1 tbsp Granulated Erythritol or Stevia
Anabolic Cream Filling
- 100g Non-fat Greek Yogurt
- 15g Vanilla Protein Powder
- 1/4 tsp Vanilla Extract
Preparation Steps:
1. Osmotic Fruit Maceration
- In a small vessel, combine the sliced strawberries, lemon juice, and sweetener.
- Toss thoroughly and set aside at room temperature for at least 10 minutes. The sweetener will draw out the internal juices, creating a viscous glaze without added sugars.
2. Shortcake Synthesis
- In a microwave-safe bowl (or individual ramekin), whisk together the protein powder, coconut flour, and baking powder.
- Add the egg whites and applesauce. Stir until a thick, cake-like batter forms.
- Microwave on high for 60–90 seconds. Note: Stop the process when the center is just set to avoid over-denaturating the proteins, which results in a rubbery texture.
- Allow the cake to cool for 2 minutes, then break it into bite-sized “”chunky”” pieces.
3. Layered Assembly
- Whisk the Greek yogurt, 15g protein powder, and vanilla until a thick cream consistency is achieved.
- In a serving bowl, layer half of the sponge pieces, followed by half of the strawberries and half of the cream.
- Repeat the layers and finish with the remaining macerated strawberry syrup drizzled over the top.
Expert Tips:
- Texture Control: If the protein sponge feels too dry, increase the applesauce by 1 teaspoon. The pectin in the applesauce acts as a moisture-locking agent during the rapid microwave heating process.
- Protein Selection: A Whey-Casein blend is significantly superior for the sponge base. Pure whey isolate has a tendency to shrink and become tough when heated, whereas casein provides a softer, bread-like crumb.
- Extended Maceration: For a deeper flavor profile, macerate the strawberries in the refrigerator for 30–60 minutes to allow the lemon acidity to fully balance the sweetness of the berries.
“
“
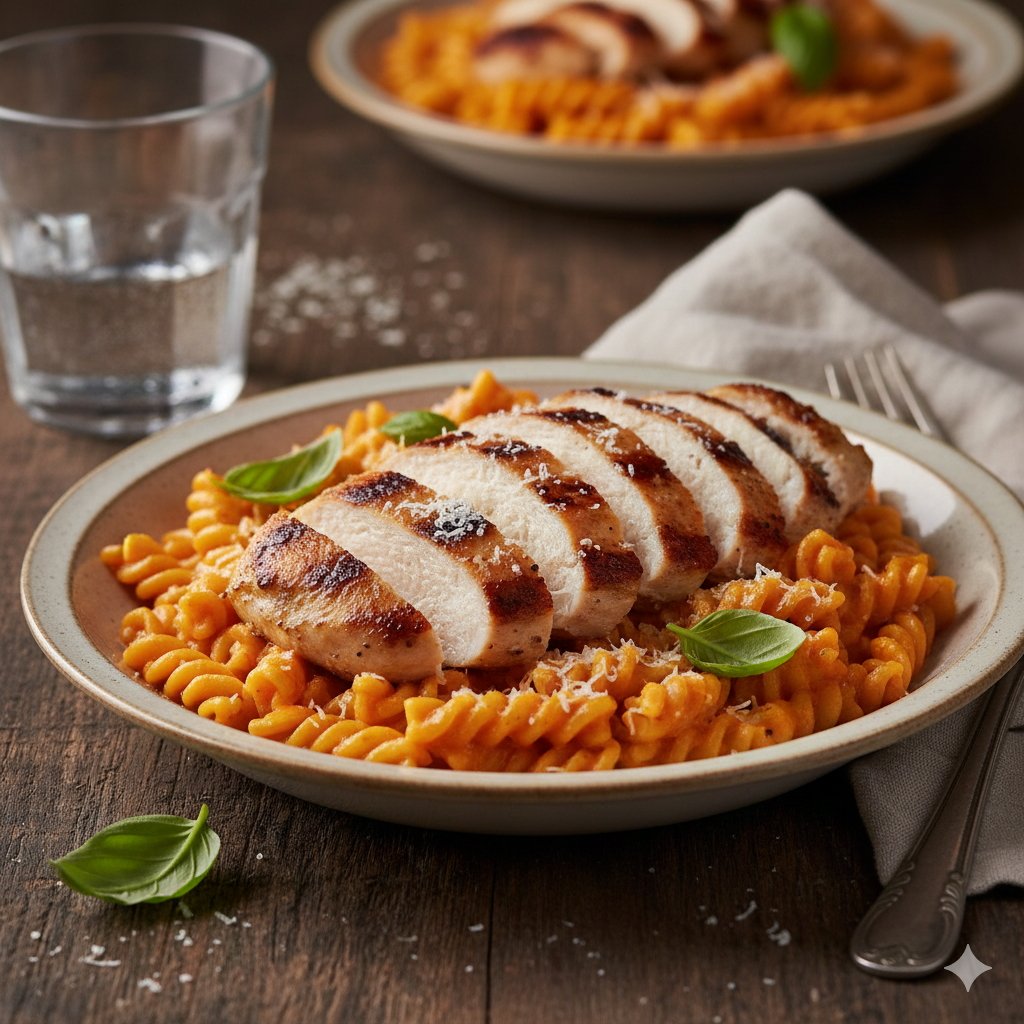
Protein-Infused “”Marry Me”” Chicken Pasta (High-Protein/Lower-Carb)
This high-protein adaptation of the viral “”Marry Me”” chicken utilizes emulsification science to create a rich, creamy sauce without the caloric density of heavy cream. By leveraging ultra-filtered milk and low-fat cream cheese, we create a stable protein-fortified sauce that binds effectively to the pasta. The distinct flavor profile is achieved through the Maillard reaction—searing the chicken breast to develop complex melanoidins—and the incorporation of sun-dried tomatoes, which provide a concentrated source of glutamates for deep umami. To further optimize the protein-to-carb ratio, this recipe is designed for use with chickpea or lentil-based pasta, which provides a complementary amino acid profile.
Recipe Details
- Prep Time: 15 Min
- Cook Time: 20 Min
- Total Time: 35 Min
- Yield: 4 Servings
- Calories: 420 kcal per serving
Ingredients:
The Protein & Pasta
- 600g Chicken Breast (cut into thin cutlets)
- 250g Protein Pasta (Chickpea, Lentil, or Fiber-enriched)
- 1 tbsp Olive Oil
- Salt and Black Pepper to taste
The “”Marry Me”” Protein Sauce
- 3 cloves Garlic (minced)
- 1/2 cup Chicken Bone Broth (for added collagen protein)
- 1 cup Ultra-filtered milk (e.g., Fairlife)
- 60g Low-fat Cream Cheese
- 30g Freshly grated Parmesan Cheese
- 1/2 cup Sun-dried tomatoes (chopped, oil-packed and drained)
- 1 tsp Dried Oregano & 1/2 tsp Red Pepper Flakes
Preparation Steps:
1. Searing & Protein Development
- Season the chicken breast generously with salt and pepper.
- Heat olive oil in a large skillet over medium-high heat. Sear the chicken for 3-4 minutes per side until a golden-brown crust forms. Remove chicken from the pan and set aside; it will finish cooking in the sauce.
2. Sauce Emulsification
- In the same skillet, reduce heat to medium and add garlic and sun-dried tomatoes. Sauté for 1 minute until fragrant.
- Deglaze the pan with chicken bone broth, scraping up the browned bits (fond) which contain the concentrated flavor.
- Whisk in the ultra-filtered milk and cream cheese. Stir constantly until the cream cheese is fully incorporated and the sauce begins to simmer.
- Fold in the Parmesan cheese, oregano, and red pepper flakes. The proteins in the cheese will help thicken the sauce into a glossy coating.
3. Integration
- Boil the protein pasta in salted water according to package directions, but remove it 1 minute early (Al Dente).
- Place the seared chicken back into the simmering sauce. Add the cooked pasta and a splash of pasta water.
- Toss for 1-2 minutes until the sauce clings to the pasta and the chicken is cooked through (internal temp of 74°C/165°F).
Expert Tips:
- Sauce Stability: Using ultra-filtered milk provides nearly double the protein of standard milk and stays more stable when heated, preventing the sauce from breaking or curdling.
- Umami Enhancement: Do not discard the sun-dried tomato oil entirely; using a teaspoon of it to sear the chicken adds an intense layer of concentrated tomato flavor.
- The “”Fond”” Factor: The brown bits left in the pan after searing the chicken are essential. They contain denatured proteins and sugars that, when dissolved into the broth, create the signature savory depth of this dish.
“